Some people find it hard to find the perfect gift. For others, it’s the wrapping part that is difficult to get right. You can’t just buy a fantastic gift, leave it in its bag, and call it a present. It would be best to make it look extraordinary by using the right wrapping paper, colored tape, and ribbons. Even the plainest-looking box can be a great container if the proper accessories enhance it. So, how do you wrap a gift with a ribbon?
There are many techniques for wrapping gifts with a ribbon. The one that you need to use will mainly depend on the shape of the gift. You can place the object inside a pre-made box. You can also make a customized bag to accommodate the oddly-shaped present. And then decorate those containers with ribbons.
Gift wrapping is pretty easy if you already have a container. However, some items are hard to place inside containers. Additionally, you don’t want to give your loved one a gift that comes in just a plain box. You want it to look as lovely as the object inside. Let’s look at the different ways to use ribbons to make any gift look extra special.
Are you supposed to wrap gift boxes?
Do you use gift boxes for your gifts? You should. Placing the item in a nice gift box not only makes the present look nicer but also protects it from getting crushed or scuffed.
While some high-end shops provide nice boxes for their items, most other shops just put your purchases in a paper carrying bag. These bags get easily wrinkled and are not suitable containers for lovely gifts.
Gift boxes are sturdy and would keep your present in one piece. Plus, they do not tear as quickly as the packaging box that most items come in. Finally, if you have an irregularly shaped present, using a gift box makes it easier to wrap.
Boxes can come in different sizes and shapes. They can also be printed or plain. Using a plain box is advantageous if you want to customize its appearance.
You can apply stickers on the surface. If you have stamps, you can stamp designs on them. If painting is your thing, you can draw and paint patterns on the box.
If you don’t have the skills for that, you can always cover everything up with a nice-looking gift wrapper. They come in different designs, materials, and colors to match your gift receiver’s style or the occasion.
However, if the box already has a lovely print on it, you can simply accessorize it by adding embellishments like ribbons, sprigs of plants, or dried flowers. You can also opt to stick buttons, laces, and other objects on the box to make it more personalized.
What is the best ribbon for gift wrapping?
If you regularly give out gifts, having ribbons in your gift-wrapping kit is a must. This small strip of material can make any gift go from bland to exciting instantly. Besides making a girl’s hair look neater and gathering a bouquet of flowers, embellishing a gift container is probably the most popular reason, people buy ribbons.
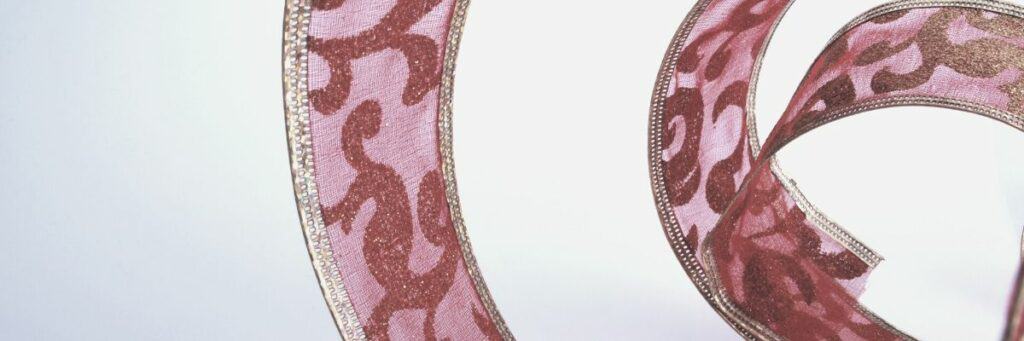
Ribbons come in so many materials, colors, and designs. Just like gift wrapping papers, they come in a multitude of styles, and choosing just one is almost impossible. How do you decide whether to buy ribbon made from organza, paper, velvet, or mesh? And which type is best for gift wrapping?
All ribbons are great for gift wrapping. However, some types suit the kind of gift inside the box and the theme of the occasion. For example, raffia ribbons are great for decorating brown, nature-themed gift boxes.
This ribbon material is great if you are going for the earthy, natural-looking gift. These are perfect for gift items like food or bath products.
Velvet and lace ribbons are very elegant. They go really well with bold-colored gift boxes. This type of ribbon can go well with luxury items and can instantly make them seem more expensive. The only downside to using cloth ribbons is that they are so hard to attach with regular tape.
Satin ribbons are beautiful and shiny. They can be floppy too. This is the type of ribbon material that you will want to use if you want to make a bow that lies flat o the box. It is not meant for making bows that require height because they will look droopy.
Grosgrain ribbons can be coarse and have a particular warped look to them. They are best to use for classic knots, rings, or single bows. Because its material is so thick, this type of ribbon would not work if you wanted to make a multi-loop bow as it creates a bulky knot when it is tied.
Finally, there is the wire-edged ribbon. This is the type that has thin wires along both edges. It can be made from different kinds of fabric like burlap, taffeta, or sheer. This is the perfect ribbon to use if you have a big box to decorate. It can be fashioned into a huge, loopy bow that holds its structure well.
How do you wrap a gift box?
There are several techniques to wrapping a box, depending on the look that you want and the gift box’s shape.
Wrapping a rectangular or square box
Step 1: Lay your wrapper on a flat surface. Unroll the paper and place the gift box on one corner of it. Measure out the amount of paper that you will need to cover all sides of the box.
Make sure to give at least one inch of allowance per side. Remember that it is easier to cut any excess paper than to add more. Cut the paper using very sharp scissors.
Step 2: Flip the box so that the seem of the paper will be at the bottom. Take one side of the paper and fold it tightly over the box. Get a piece of tape and use it to attach the paper’s side onto the bottom of the box. Repeat the step for the other side of the paper.
Step 3: Fold down your wrapping paper over the edges of the gift box. Make sure that you get sharp creases on the sides of the paper. Take your creased edge and wrap it tightly against the gift box.
Step 4: Tape the tip onto the box. Repeat this with the other side. You will be creating two triangular flaps on each end of the box.
Fold that triangle flap against the box and use a small piece of tape to attach it to the box’s side. Do the same with the other flap. That will give you a neatly wrapped rectangular or square box.
Step 5: All that is left to do is to choose and attach the ribbon. You can do a basic ribbon wrap. You can start doing this by measuring a length of ribbon about six times as wide as the gift box. Flip the box right side down and place it over the middle of your ribbon.
Wind the ribbon around the gift and twist the strips around each other. Stretch the rest of the ribbon perpendicular to the original direction that you wound it. Make sure that you pull the two ends tightly to lay them flat against the box.
Now, flip the gift box over and tie the ribbon into a tight knot at the center of the box. While holding the two ends, make two tight bunny ear loops. Cross the one you are holding in your left hand over the one in your right.
Bend the left ribbon loop around and push It through the hole that you created under the loops. Pull the loops tight. Fix the box so that it is symmetrical. You can also make
Wrapping a circular box
Step 1: Just like in the steps before, roll out your wrapping paper. Put the gift on one edge and roll the box. Ensure that you have enough to go around the entire thing, with a few inches of extra paper.
Step 2: For the top and bottom parts, turn the circular box sideways and place it on the wrapping paper in such a way that the wrapping paper is halfway up aside. Measure the same length on the other side and make a crease so that you’d know where to cut.
Step 3: Get a piece of tape and attach one end of the wrapping paper. Wind the paper around the gift until it is fully covered. Pull the paper tightly and then secure the end with tape.
Step 4: Starting on the top side, fold the paper and make a crease on the edges. Roll the gift a little and continue folding and making creases until the gift’s base is completely covered. Repeat the process on the bottom side of the round gift box. Secure the paper flaps with tape.
Step 5: To cover the part where you made the flaps, you can attach a big bow to it. For this, get a piece of ribbon that measures about 3 yards.
Grab one end and curl it to create a loop. Pinch the base of the curl with your fingers. Twist the ribbon near where your fingers are. This will ensure that the front part of the fabric is right side out.
Fold your ribbon under that curl to make the first loop. Make sure that the loop is not too big as it will become too floppy. Twist the ribbon and pinch the center. Always make this twisting motion to ensure that the ribbon’s fabric is facing out.
Make the next loop by folding the ribbon on the side opposite the first loop. Make sure that the loops are the same length before twisting and pinching the ribbon one more time. Repeat these steps until you have five or more loops on each side.
Insert a wire through the bow’s center loop. Wrap this around the ribbons and twist it at the back. Trim one of the ribbon’s tails to the desired length. Insert this through the center loop. Tighten the ribbon wire and trim the other tail to match the first one.
Pull on the loops up or down to arrange each one to form a circular bow. Don’t pull too hard, or the bow might unravel. Trim the remaining tails to match the length of the loops. Finally, use hot glue to attach this to the top of the circular gift box.
How do you wrap odd-shaped gifts?
The best way to wrap oddly shaped gifts is to make a custom gift bag for them. You need to make sure that the bag is big enough to contain the item. After wrapping, you can still decorate this container with ribbons and other accessories.
The first step in making a customized gift bag is to cut the pieces of wrapping paper. Unroll the paper and place the object towards one side of the paper. Fold the paper over and allow for at least two inches of overlap between two ends. Cut the wrapping paper at that point.
Remove the present and set it aside. Take the two ends of the wrapping paper and fold these towards each other. Overlap the two edges by an inch, then apply tape to secure the ends.
Fold the bag with the taped part in the center. Measure about 12 inches from the bottom of that bag and fold the paper along that length. Make a crease using your fingers. Grasp the sides of the paper where it is taped. Open that and make a diamond shape.
Get the top diamond half and fold it all the way to just beyond the middle part of the diamond. Do the same for the bottom part. Tape the tips of the diamond and the diagonals. Ensure that this area is taped correctly or rip open when the item is placed inside.
Now, open the top of the bag and slip in the present. You can also wrap the present with tissue beforehand if needed.
Fold the top about two times and seal it with tape. You can now add your ribbons, gift tag, and other embellishments. You can also punch two holes at the top of the bag to insert strings to turn into handles.
Now that you know the basics of wrapping gifts and embellishing it with ribbons, you can experiment and research on more complex wrapping techniques to make your present look extra special.